Removing Mold from Painted Walls
A clean home involves much more than vacuuming and dusting off some shelves. Your walls are one of the main features of your Maryland home from the outside in.
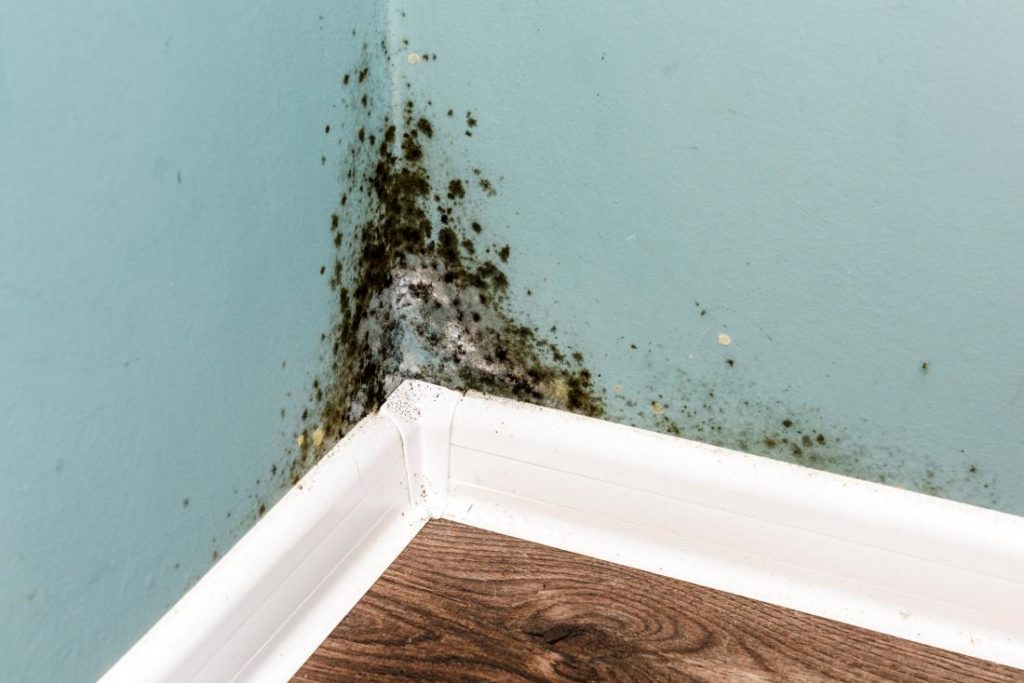
Mold and mildew on painted walls present respiratory health risks in addition to ruining a wall’s appearance. Lack of sunlight and moisture rich environments provide the right conditions for mold and mildew growth.
In this article, we’ll provide an overview of different types of mold that show up in the least welcome yet most expected places and how to clean your painted or drywalls with a combination of simple at home solutions and safety measures.
- Know your mold and mildew
- Overview of common mold colors
- Before removing mold from your Maryland home walls
- Gathering and organizing your supplies
- Mold removal preparation and considerations
- Painted walls do-it-yourself
- Bare drywalls do-it-yourself
- Proceed with safety and caution
Know your mold and mildew
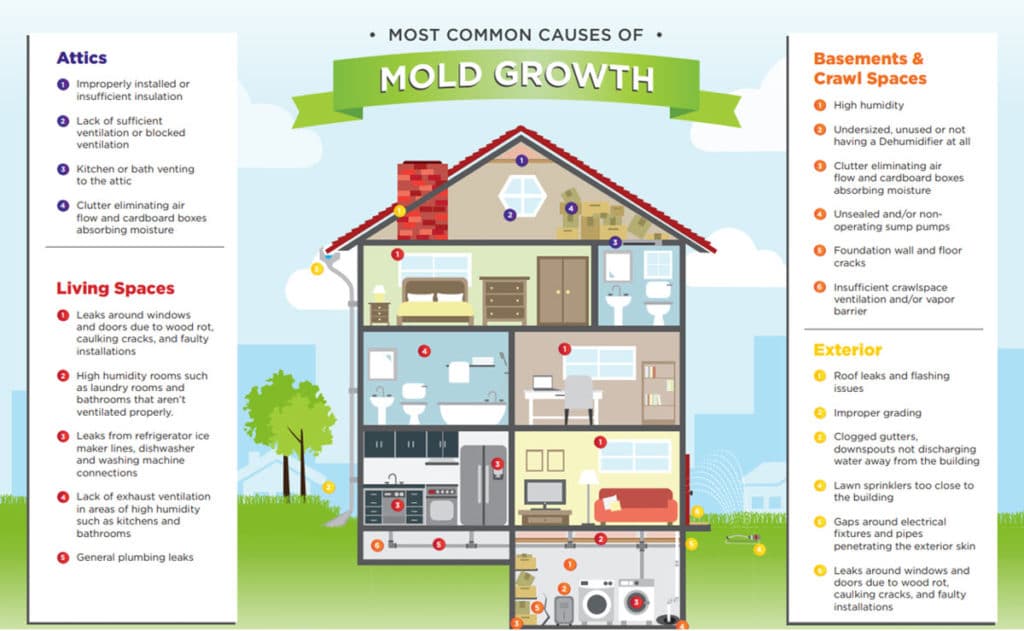
Mold can grow wherever there’s an abundance of moisture, making its appearance on your home’s walls, ceilings, and floors. In addition, basements, shower walls, and windowsills are mold hot zones.
For all intents and purposes, mold and mildew are the same thing. Mildew is generically used to describe minor mold problems like the kind found on shower tile grout. Certain molds can become highly toxic if left unattended causing allergic reactions including asthma and other respiratory complications. Especially at risk are small children, the elderly and anyone with existing respiratory illnesses or weakened immune systems.
Mold comes in many shapes and colors, none of which accurately determines the actual species of mold. However, mold does come in well-known shades of black, white, green, blue, and in various combinations of these colors.
Overview of common mold colors
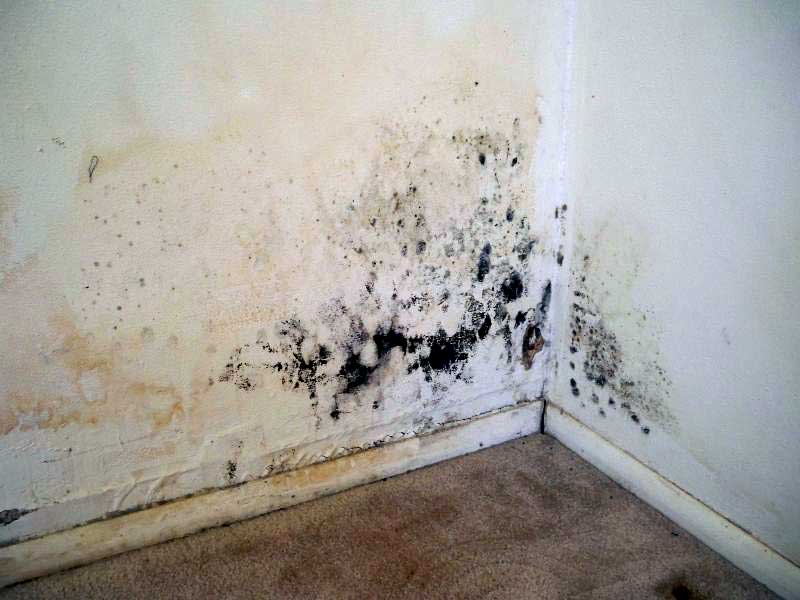
Black mold
-Often found in houses with excessive moisture damage to wallboard and additional surfaces
-By itself isn’t harmful but can produce mycotoxins potentially harming people and pets depending on the species of black mold
-As a rule of thumb, “use caution” when removing all molds, especially when in abundance.
White mold
-Often found in cool, damp environments like basements and walls
-Confused with efflorescence, a mineral deposit that forms on foundation walls and other masonry surfaces from water seepage.
-Test to see if it’s mold by spraying with water. If it doesn’t dissolve, you’ve most likely got white mold.
Blue
-Found in areas like bathroom walls and ceilings
-Moisture that builds up on walls after long, hot showers offer the right conditions for this mold to form and multiply.
Green
-Common in houses and like blue mold appears in moist areas like shower walls and damp corners
-Can remove by scrubbing with a bleach solution
Before removing mold from your Maryland home walls
- Begin by identifying the source of water intrusion and make sure to resolve it before attempting to remove mold. (Otherwise, mold spores are likely to return.)
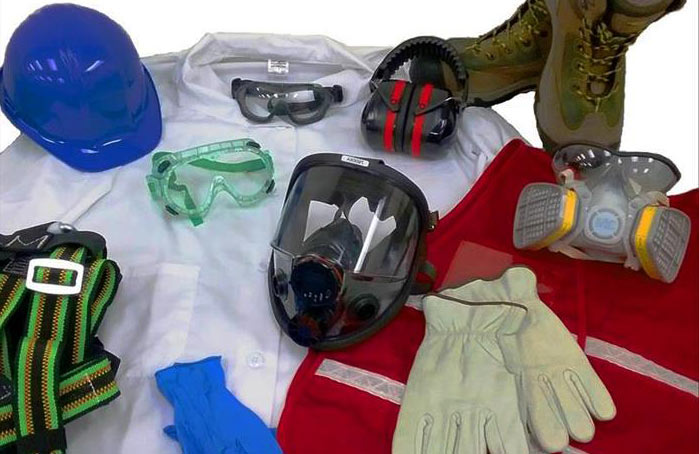
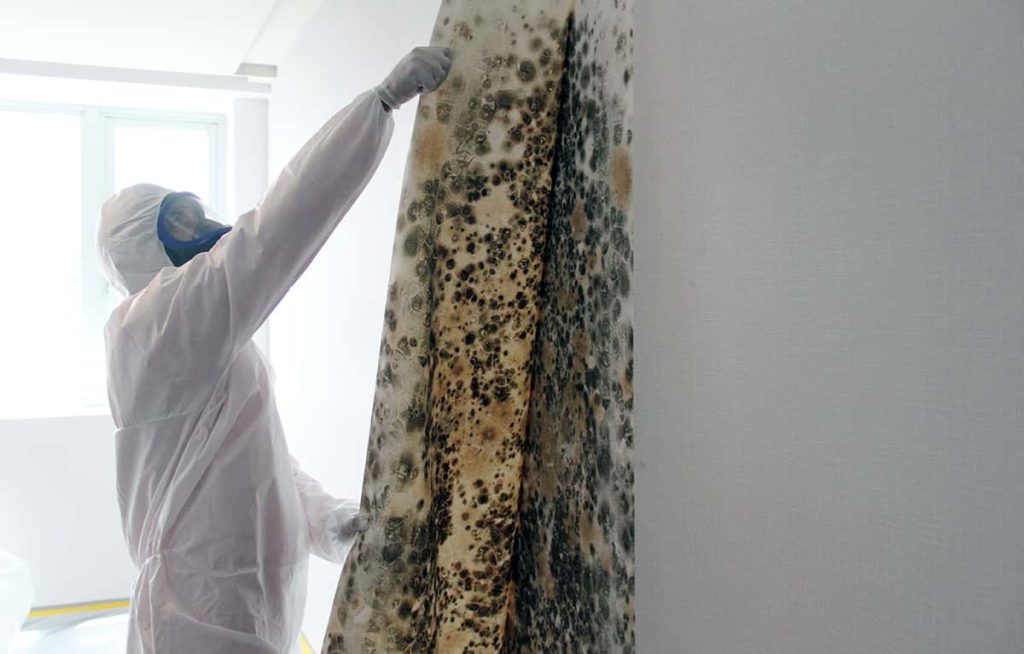
- For safety, ALWAYS wear protective suits, masks, gloves, and eyewear.
- Air filtration devices equipped with HEPA (High Efficiency Particulate Air) filters should be used to direct air outside to ensure that contaminants are not transferred through the air during removal.
- If possible, close air vents and turn off your HVAC system.
- Place rags, towels, gloves, and any other materials used for mold removal in sealed plastic bags removing them from the affected area and discarded.
- Moldy drywall should be removed two feet beyond the visible mold spores.
- Cleaning the mold remediation area should be done with a disinfecting agent containing quaternary ammonium chloride and a HEPA-vacuum.
- Keep immuno-compromised people out of the containment area.
Gathering and organizing your supplies
If you decide to remove mold on your own, here’s a shopping list to get started:
Checklist
-Commercial mold cleaner (optional)
-Heavy-duty sponge
-Bleach
-Bucket
-Scrub brush
-Safety goggles
-Rubber gloves
-Respirator/dust mask
-Towels
-Mold/mildew stain remover
-Dehumidifier
-Interior paint
-Interior primer/sealer
-Waterproof sealant
-Plastic drop cloths
-Painter’s tape
Mold removal preparation and considerations
Assess damage
-If you notice mold on any interior walls, assess the condition of the wall and the extent to which the mold has taken over.
-If the drywall is crumbling or bowed out and covered with black or bluish splotches, it needs to be replaced.
-If the wall is structurally sound but still covered with mold, you should be able to remove the spots with a cleaner and some elbow grease.
SAFETY TIP: Certain molds are better off treated by mold remediation professionals because they are toxic in larger amounts. If you have large amounts of mold in a particular area (10 sq ft or more), it’s highly recommended you call a remediation professional.
Prepare the area
-Since you’ll be using bleach or commercial mold-killing chemicals, protect the surrounding surfaces from any kind of spills that can cause damage.
-Cover the floor with plastic drop cloths and tape into place with painter’s tape to secure.
-Keep several old towels nearby to catch any spills.
Get rid of the mold
-The best cleaner for removing mildew and mold from walls is a bleach/water solution.
-Mix 1 part bleach to 3 parts water and apply with sponge or rag.
SAFETY TIP: Wear waterproof rubber gloves any time you clean with bleach/cleaners to protect your skin and hands.
Use Stain-blocking paint
-After cleaning off the splotches of mold, there could still be leftover stains on the wall surfaces.
-Use primer/sealer
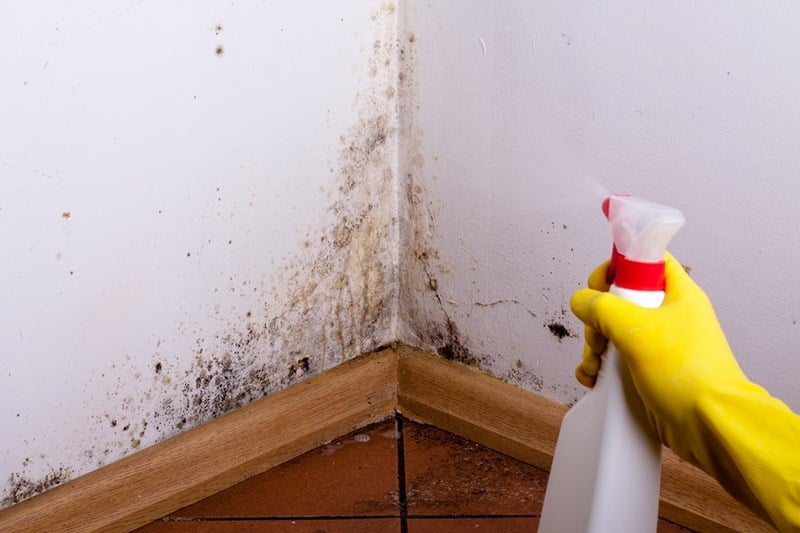
Painted walls do-it-yourself
For painted walls, mold is generally easier to clean. To remove mold from painted walls:
- Move everything away from the area and off the wall so you don’t transfer the spores to another area. Place plastic on the floor to protect it.
- Use warm water and dish liquid containing a surfactant to moisten a huck towel or cotton rag to remove dirt and debris. This won’t kill the mold, but it will make it easier to remove the mold in the next step.
- Get a mold cleaner from your home improvement store or use a bleach solution made of 1 part bleach to 3 parts water.
- Spray affected area, scrub, and wipe clean. Spray again, let sit for 10 minutes, wipe (with other side of rag/towel to avoid re-contamination). Rinse and dry the wall.
- If you scrubbed any paint off, you’ll need to repaint it. Use a mold-inhibiting paint if available.
- Make sure you thoroughly dry your wall before repainting.
Bare drywalls do-it-yourself
If you find mold on your drywall, it can indicate a larger mold problem in the stud space behind the drywall. Since mold on drywall has already penetrated the surface, you won’t be able to just wipe it off. Instead, you’ll have to cut it out and replace it.
Here’s how:
- Move everything away from the area and cover the floor with plastic.
- Use a stud finder to locate the wooden supports behind the wall.
- Mark the area you plan to cut with a pencil and straight edge, making sure to mark a space 2 ft larger than the visible mold to ensure you get mold that is present but not as easily visible.
- Cut out the section you marked with a utility knife. DO NOT use a power saw because this can agitate the mold, making the spores go airborne.
- To limit the spread of mold spores, carefully remove the drywall piece and place it mold side up on the plastic floor covering.
- Clean the cavity with mold cleaner and let it dry thoroughly.
- Make sure your new piece of drywall is the same size as the one you cut out.
- Measure the length and width of the missing section of drywall and cut the new section to those same exact measurements.
- Attach your new piece of drywall with screws, apply a joint compound to patch seams, and allow it to dry and sand.
- Wrap up soiled materials in plastic and discard.
- Vacuum treated room with a HEPA vacuum.
Tips:
- If there are stains left after cleaning and disinfecting, paint over them with a primer to cover stains before adding a coat of paint.
- If the mold isn’t too widespread and you’d like a more natural removal method, spray the mold with vinegar and leave for 1 to 2 hours. Then, scrub with a baking soda and water mixture. Rinse with clear water.
Proceed with safety and caution
We hope you found this article useful in better understanding how to remove and treat mold on your walls whether it’s painted or drywall. With any kind of home project, please exercise safety and caution and if something feels off, it’s not worth taking the risk and ignoring your gut. Consider contacting a professional mold remediation specialist if your mold problems keep reappearing or seem to be getting worse.
Recent Comments